
My son streams his games on YouTube. The setup is complex for a 8 year old to get going. He also had issues remembering to turn everything off when finished.
I set out to automate everything using the stream deck. It’s easy enough controlling Streamlabs OBS and Windows. Controlling the studio lighting is easy with voice commands but, he forgets about the commands.
I use Openhab and mqtt for lots of communication in the system. It’s an easy way to expose items that use different protocols and makes them generic. I write some rules to interpret the incoming mqtt messages and perform an action.
You can use mosquitto on Windows without installing it fully as a service. Then you can use the command line to publish messages. With the commands available, you can then write batch files for the commands and assign the batch files to the stream deck as an open application shortcut. The batch file runs silently and launches mosquitto for the action only. The response is fast and the application is light on the computer.
You can install mosquitto from the main site but, if you just need to run the commands available and do not want a service running all of the time, you can get a folder of the program with everything needed from here. Just place the folder wherever you want and either run commands from the command line or create batch or powershell files to execute the publish commands. If you do run the service, you can use other utilities to perform actions within windows itself. I do not currently have a need for feedback on the computer and can see that the lighting is changed as a response.
My batch file is simple enough and can be copied to change for anything you want to publish to. You just need to refer to the location on the drive to run the command. Here is an example of sending a number to a topic:
"%programfiles(x86)%\Mosquitto\"mosquitto_pub -h 192.168.1.100 -m "0" -t
mymosquitto/home/basement/streamdeck/ -u username -P password
``
I placed the folder in program files, it can be anywhere though. Then you need to run the command from this location if you have not added mosquitto to your system variables.
The second part of the command uses mosquitto_pub to publish . -h is tells the command where the host of the the mqtt server resides. Follow this with the IP address of that device. -m denotes the start of the message to send. I decided to use 0 and 1 to represent OFF and ON respectively. -t is the topic to send the message to and this can be wildly different depending on however you set up your mqtt network. mymosquitto is the base name of the network. /home is to denote that I am sending this to the home automation section of the setup and the base topic for my home automation is home. /basement is the area of the house that the streaming setup resides within and /streamdeck/ is the device I want to logically understand where the messages are coming from.
-u sends the username you have set up for your server and you do not have to have a username and password but, it is better to have one than not in case of whatever attacks that could be performed on mqtt iot devices in the future. It is 1 more thing to get around and will keep you safer than not. -P is the password to send and needs to be uppercase.
All of this and more can be understood by looking through the man pages on the site here. MQTT is an awesome way to send messages around to trigger things and gain information on device states. It can help glue together your setup and once you have an understanding of the workings, becomes a invaluable tool in your automation setup.
Binding the buttons to your setup is easy. There is not a way, currently or that I could find, to make 1 button that triggers both commands. Instead, I set 1 button to launch an application and another to launch the other application. Create a batch file for each action you would like to perform. I created some icons that have a light bulb with a red background and a green background. Red turns off and green turns on.
View fullsize
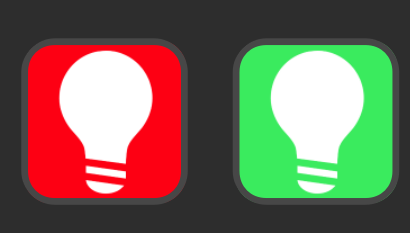
I used the default light bulb icon on the streamdeck website and replaced the backgrounds.
I created a folder with the batch files in the documents folder and in the Streamdeck launch application setup area, pointed to the batch file for each of the actions.
Now, when my son presses the green button, Streamdeck runs the batch file silently. Mosquitto starts, connects, send the message and then stops. Openhab sees the message come in and triggers the rule to send the Z-Wave outlet the ON command. The outlet responds and the task is complete.
Since I have used Mosquitto for years, I have not started to use the Openhab 2.5 version of the built in MQTT service. I would rather have an easy to port setup that can run anywhere, instead of something that will probably change over the next year to the point I will have to redo everything again.
My Openhab configuration to handle all of this includes:
-
A thing set up using the paper UI discovery section.
-
go to inbox, click the + sign and choose MQTT
-
Click on “Manually Add Thing”
-
Select “Generic MQTT Thing
-
Name the thing
-
choose a unique ID or go with the generated one
-
define a location if you want to
-
select your MQTT bridge.
-
-
-
An item defined in text format, I use Visual studio code to work with Openhab since it is amazing now.
-
Open or create your mqtt.items file and place your cursor in an empty spot
-
Find the new thing created under the Openhab section of visual studio code and right click on it to get the “Create items from channels” selection.
-
Click on the selection to insert the item channels.
-
Rename the item if you want and give it a label.
- Number StreamdeckInputsStudioLights “Studio lights” {channel=”mqtt:topic:daf8936f:studioLights”} //Is my naming on my system
-
save the file
-
-
A rule to deal with the incoming message.
- rule “MQTT Streamdeck Actions”
when Item StreamdeckInputsStudioLights received update then if(StreamdeckInputsStudioLights.state == 1){ sendCommand(Studio_light_Switch, ON) } else if(StreamdeckInputsStudioLights.state == 0){ sendCommand(Studio_light_Switch, OFF) } end- Save the rule file
With all of this set up, you should now have a functioning MQTT setup using the Streamdeck. You can expand this is so many ways now. Anything that you can control with your system is now controllable through Streamdeck with a handful of steps to get you there. I have not yet set up some other possible actions but, plan on trying out some things I found on GitHub. There is a service that will take incoming MQTT messages and run rules on the windows machine to do things. I could imaging using this to automate working conditions for different tasks.
With Openhab, you can control almost anything. You can expose items to every control method online. Google assistant, Alexa, Homekit and HomeAssistant are just a few. You could set up lighting conditions in a similar way that the Streamdeck changes profiles based off of the program currently in use. When I am using Zbrush I am not going to have my workshop lighting on because the lights reflect off of the screens in use and I tend to design in the dark. You could set up autohotkey to see the exe in use and run a batch file that creates the lighting conditions you use for that task.
You could create a google assistant routine for mornings in which you plan to do design work. Start the coffee, turn on the morning lights to the correct brightness, set the lighting in the studio and run the application you are about to use. Just say “Hey google, this morning I want to work in fusion”. Then the scenario you programmed will play out. With Openhab and the app on android, maybe IOS, you can send alarm notifications to the system. Link your google calendar to Openhab and create calendar events with keywords that trigger rules. This way, by the time you walk to get your coffee, it is done. You can then proceed to the computer and the programs you want to work in are running. Potentially less distracting work flows because you do not need to get off of task while trying to get to the task you planned on.
All of this has opened up many ideas for future plans on automating my routines. Hopefully this little write-up can inspire some ideas of your own to contribute to the community.


Leave a comment