
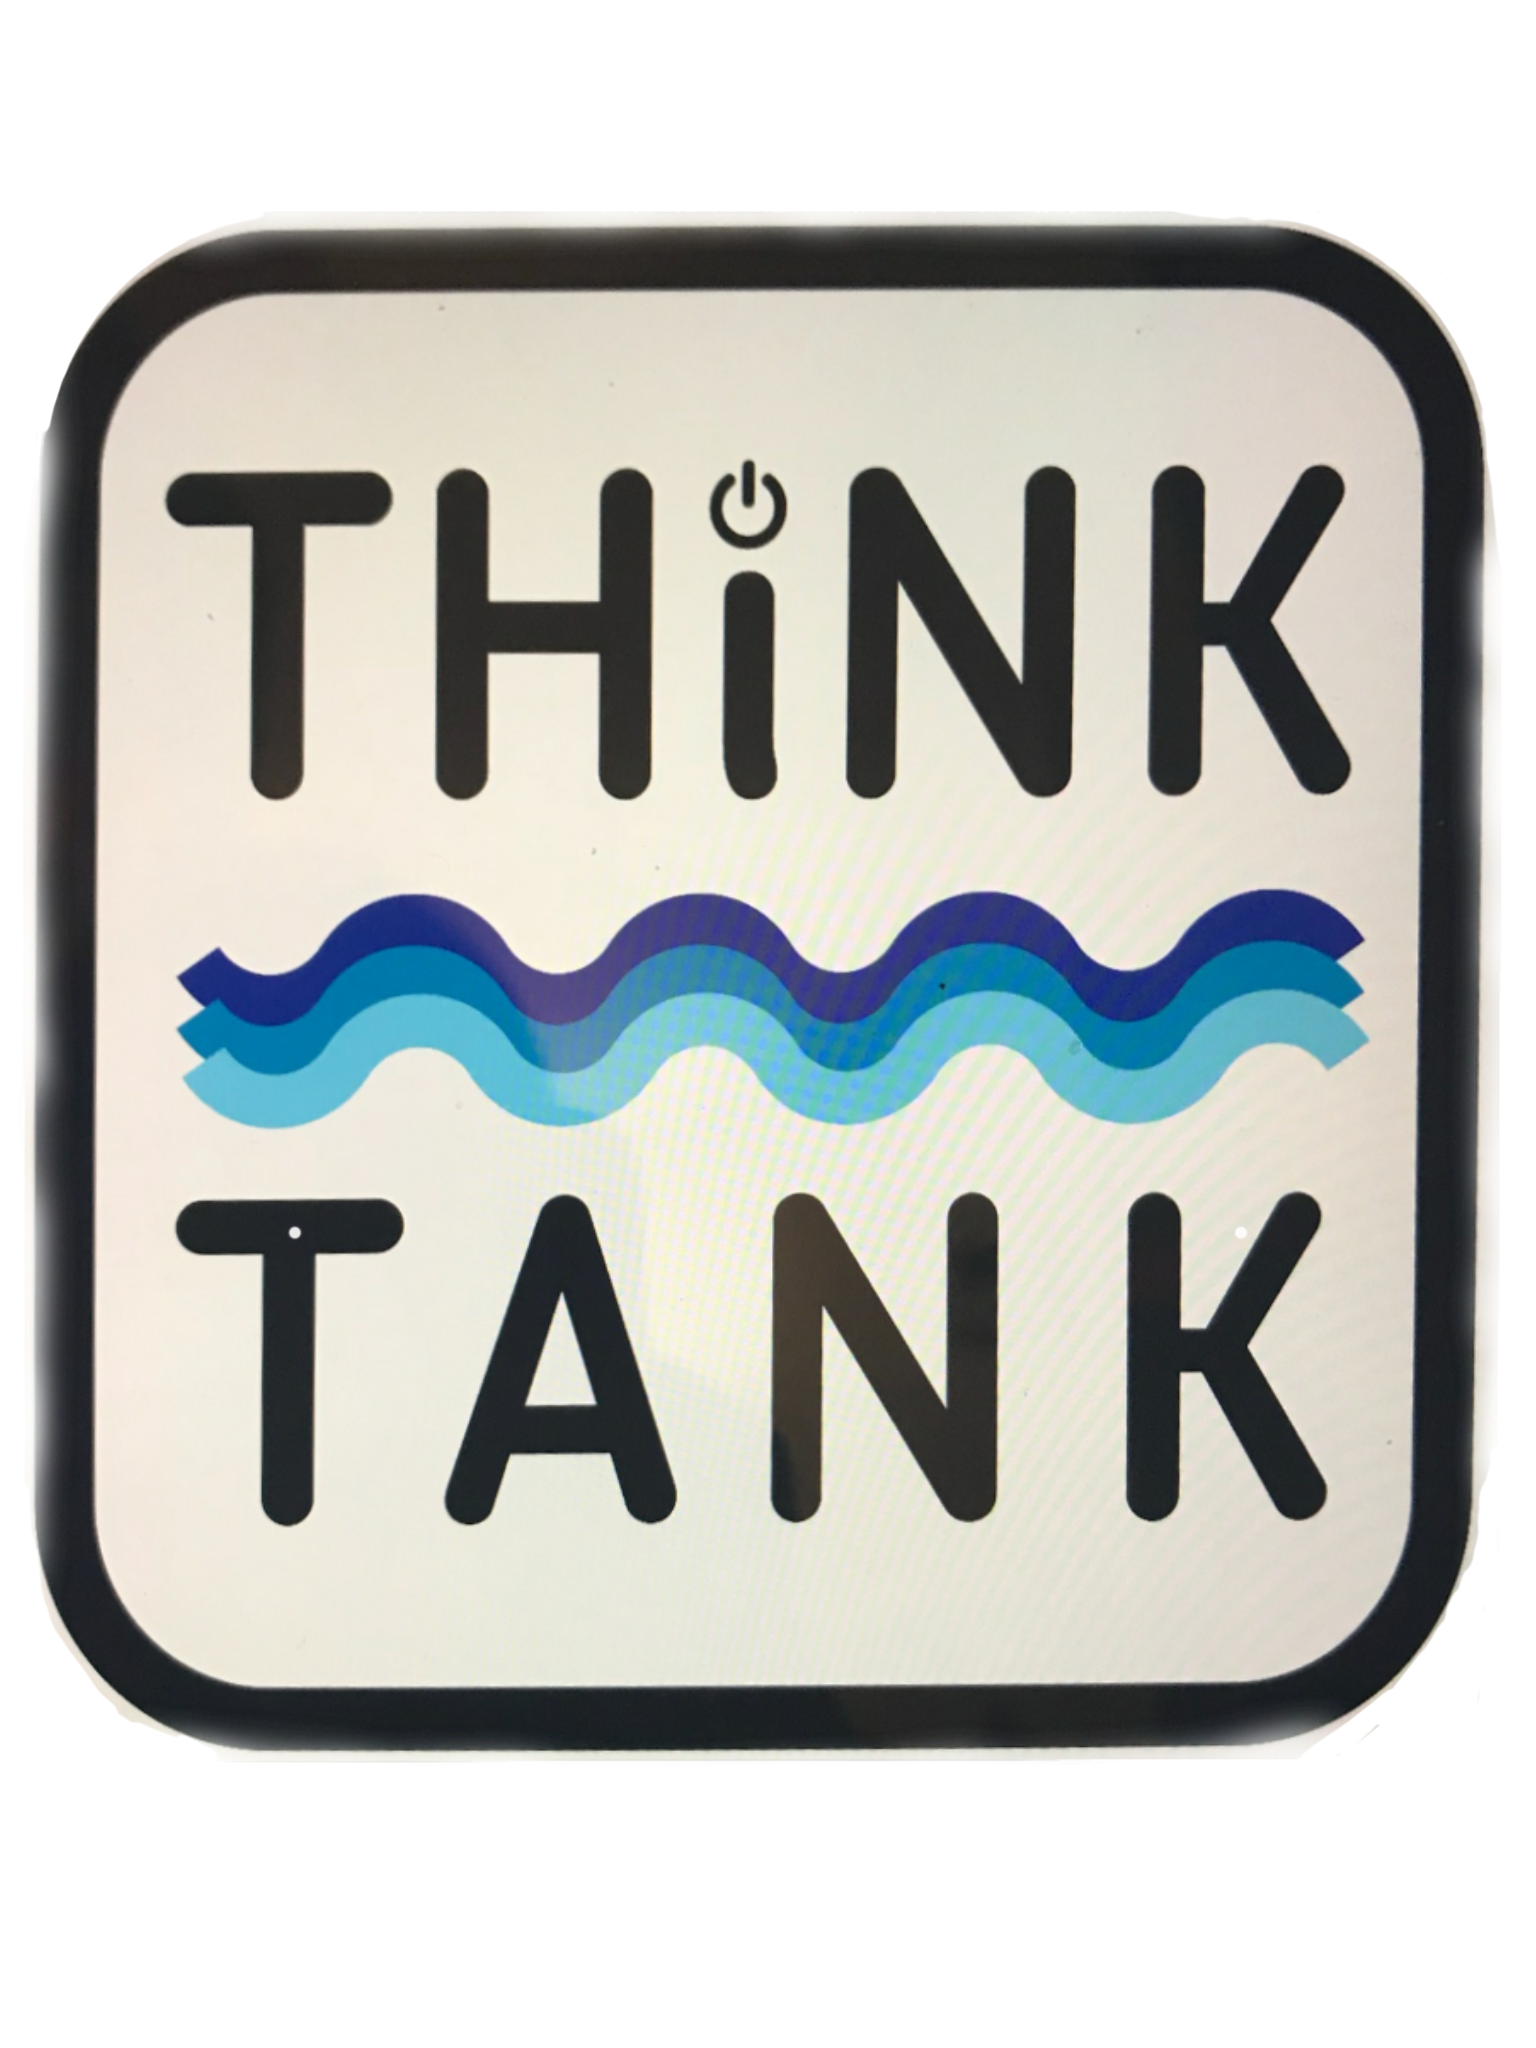
A friend of mine has 2 float tanks in Newport Kentucky. Think Tank Flotation is the name. It is located across from downtown Cincinnati and I volunteered to make a sign for the business. The sign is for the inside, too many electronics and mechanical components to last long in the swings of the Ohio river valley weather.
First was to incorporate their logo into the design.
View fullsize
![]()
Since there are waves within the design, I decided to try and make a kinematic machine that mimicked a wave. The first design I created included a shaft that had offset cams running the length of it. At first, I tried to over-engineer the mechanical parts and it ended up too loud for where it was going. I made the cam mechanism and added brass balls to the end of acrylic rods, the balls would ride against the cam mechanism to move acrylic blocks up and down. The blocks and the rubbing of the balls on the cam cause so much noise. The steppers are loud enough as is. This was going into a deprivation tank business, they rely on the fact that you have little sensory input while there and me adding to the noise to remove was not something I wanted to do.
I wanted a challenge and motivation to finish something that would either reinforce what I have learned in design and manufacturing or add to my skills. This was fairly challenging and took me months to complete in spare time. I used neopixel LEDs, a stepper motor and 2 arduinos. 1 for the lighting and the other for the motion control.
The reason I used 2 arduinos was because the lighting code blocked while running and introducing the motor movements caused issues. The same is for both operations. the motors would also block while running. Easiest thing to do was to use 2 instead and allowed me to finish and get what I wanted out of it. I used inexpensive versions of the devices that I buy in larger quantities from banggood or aliexpress throughout the year. Wemos D1 minis cost around $3 each in packs of 5. I wanted to make it controllable using WiFi, but did not get around to doing that because I wanted to finish this and get it installed.
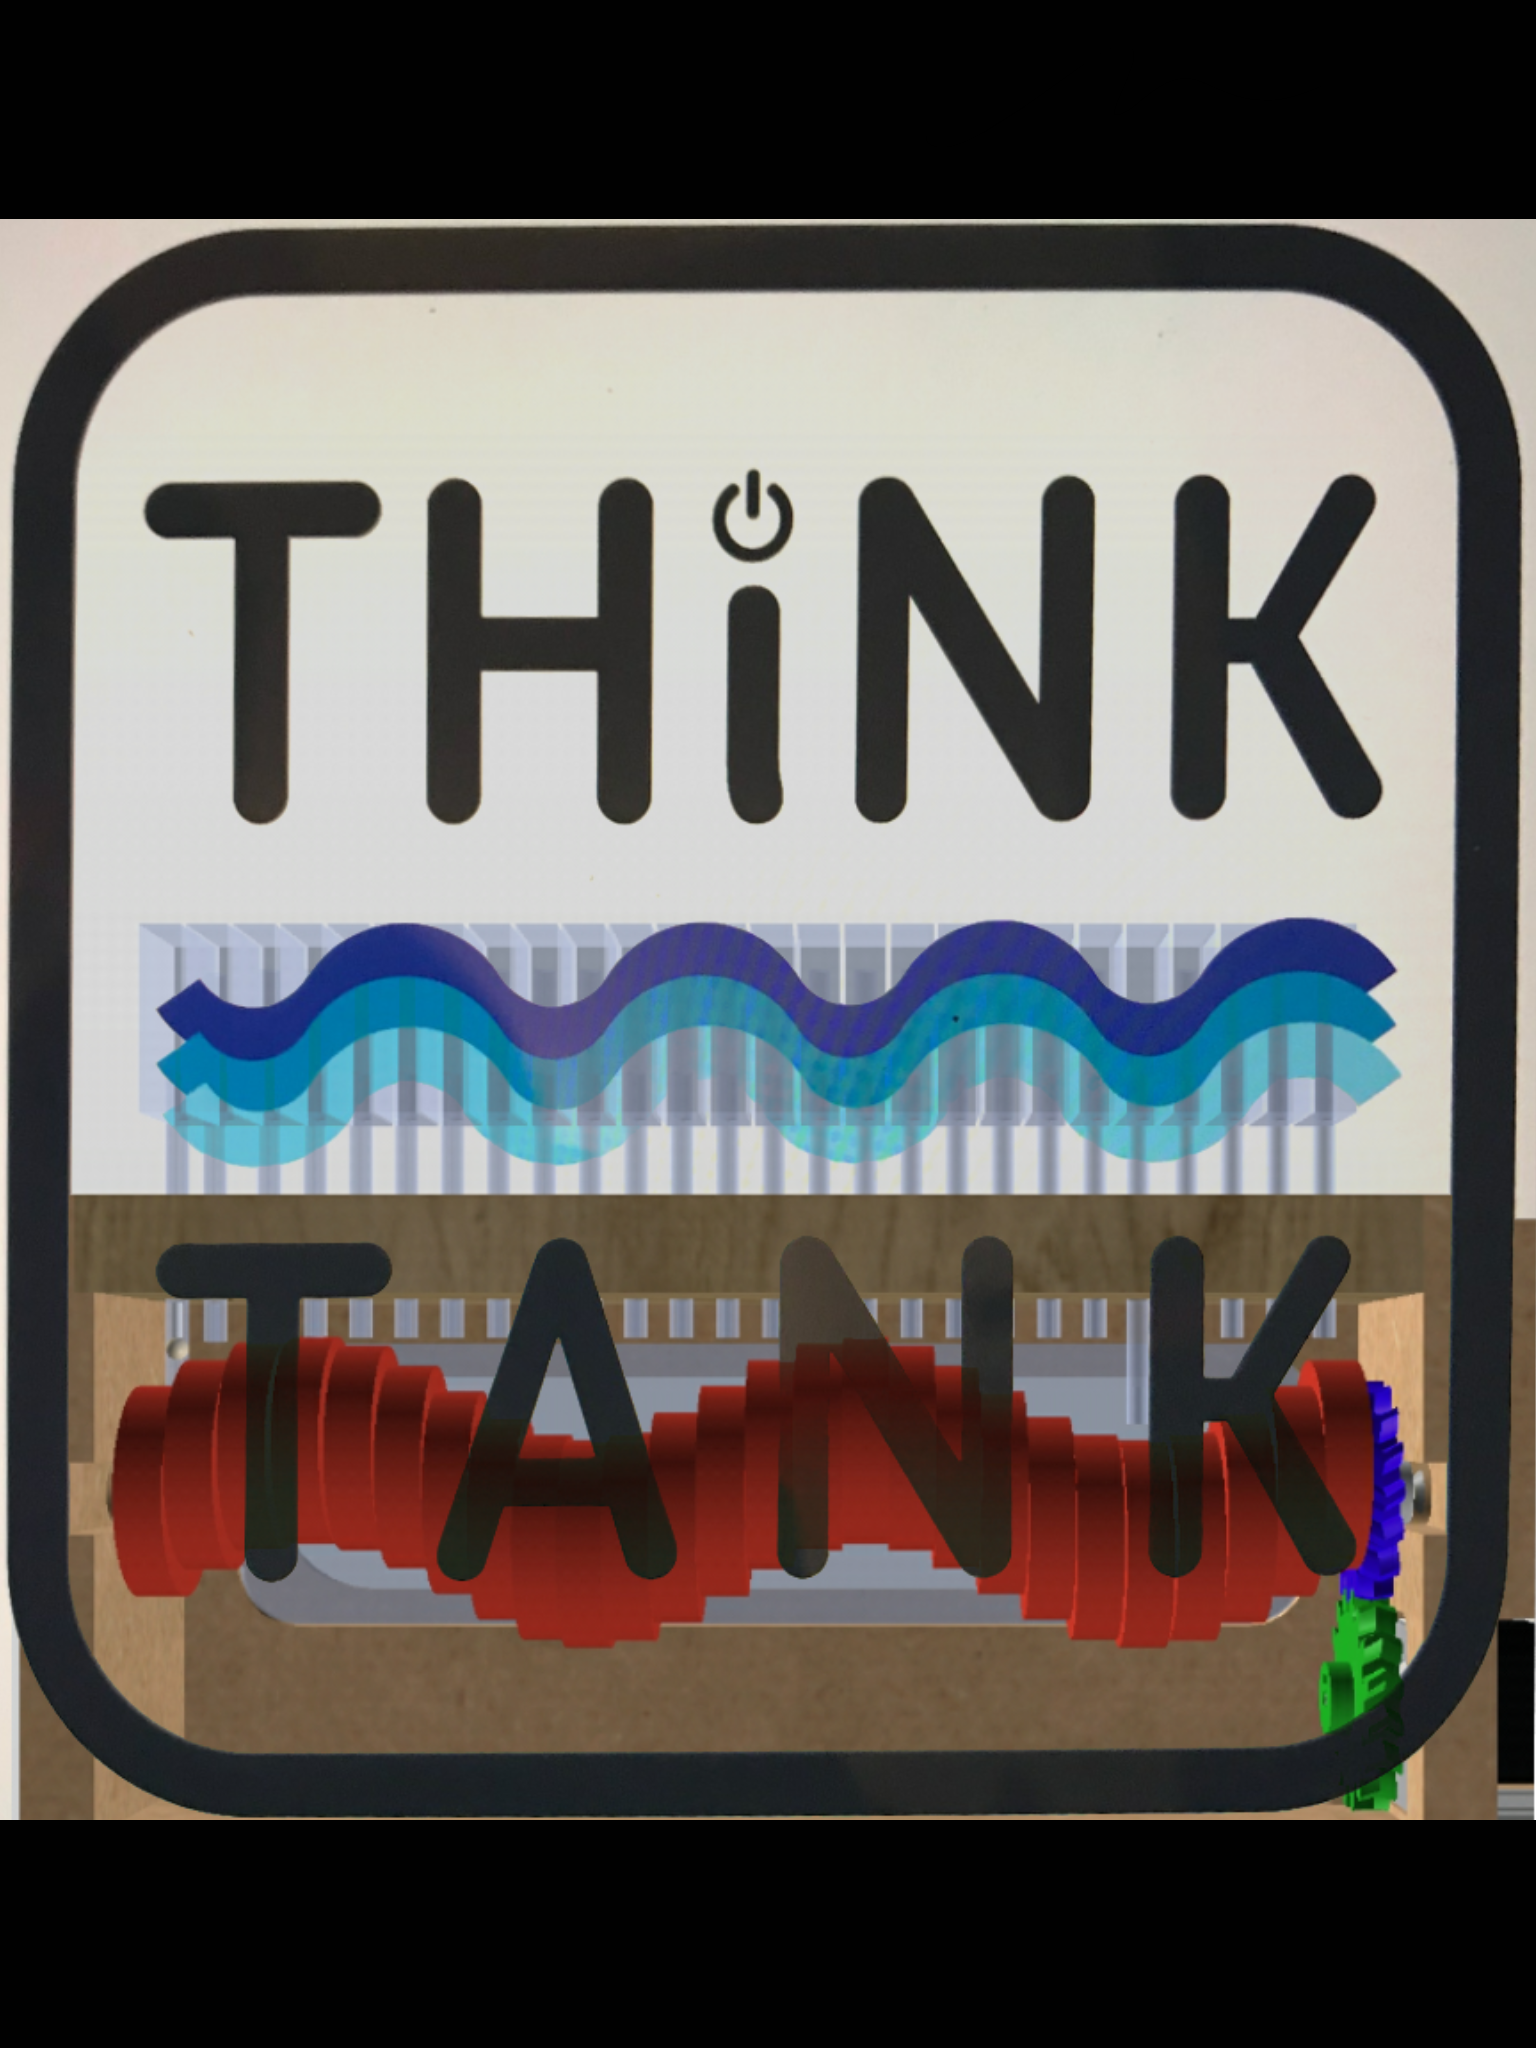
After machining everything, glue-up and testing, I decided to scrap the whole idea because the cams rotating looked like a wave on their own.
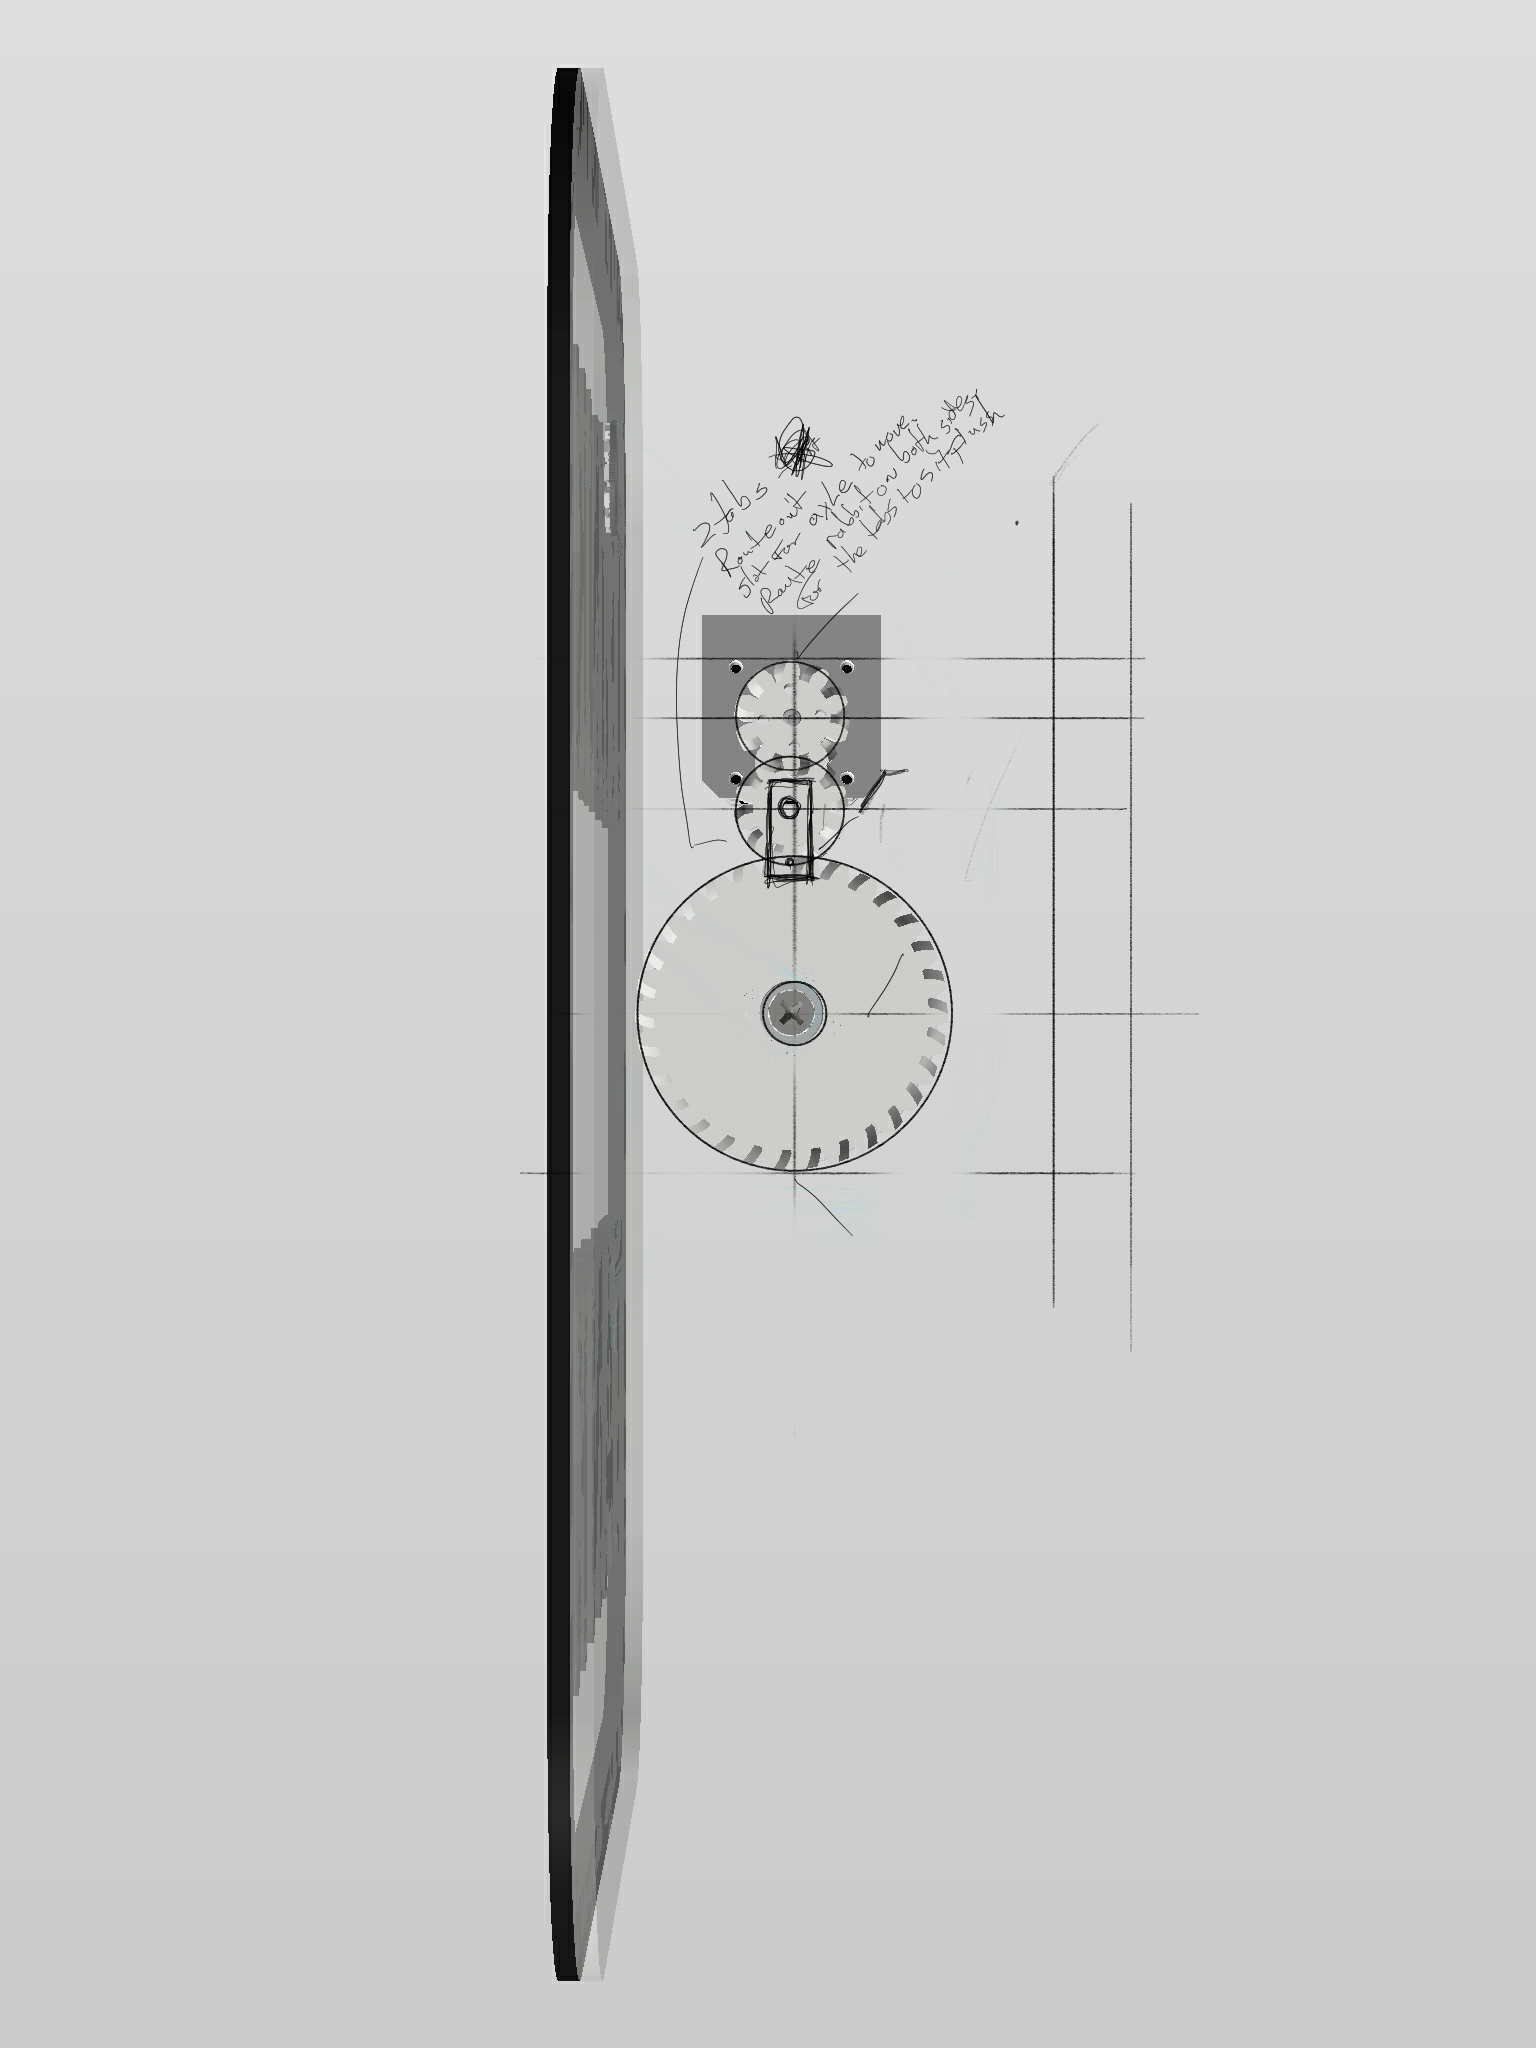
I then machined the cams out of acrylic, sanded them to make them look frosted for light dissipation. Then I glued them all together into the cam configuration. I used a stepper motor and printed some herringbone gears to link the motor to the camshaft. I used a strip of NeoPixels to create the light animation while also matching the color of the logo. The cam spins in one direction, slows down and then reverses. I added 3 push button switches to set the stepper motor drivers to different speeds without reprogramming. This would allow the end user to choose a speed that they want without having to do anything on the computer.
The logo also has the power logo on it. I decided to make it look like it was “breathing” all of the time. To do this, i used a neopixel ring and a single neopixel. The animation worked very well.
I changed the design to remove all the blocks and acrylic rods. Then moved the camshaft into the main window of the sign. Machined all of the acrylic parts needed to complete. I decided to backlight the letters by machining pockets into the white acrylic, machining the letters out of black acrylic and then gluing them into the pockets. i chose white LED strips for the backlighting of the letters. The light bleeds out of the edges of the black acrylic and make the letters stand out well.
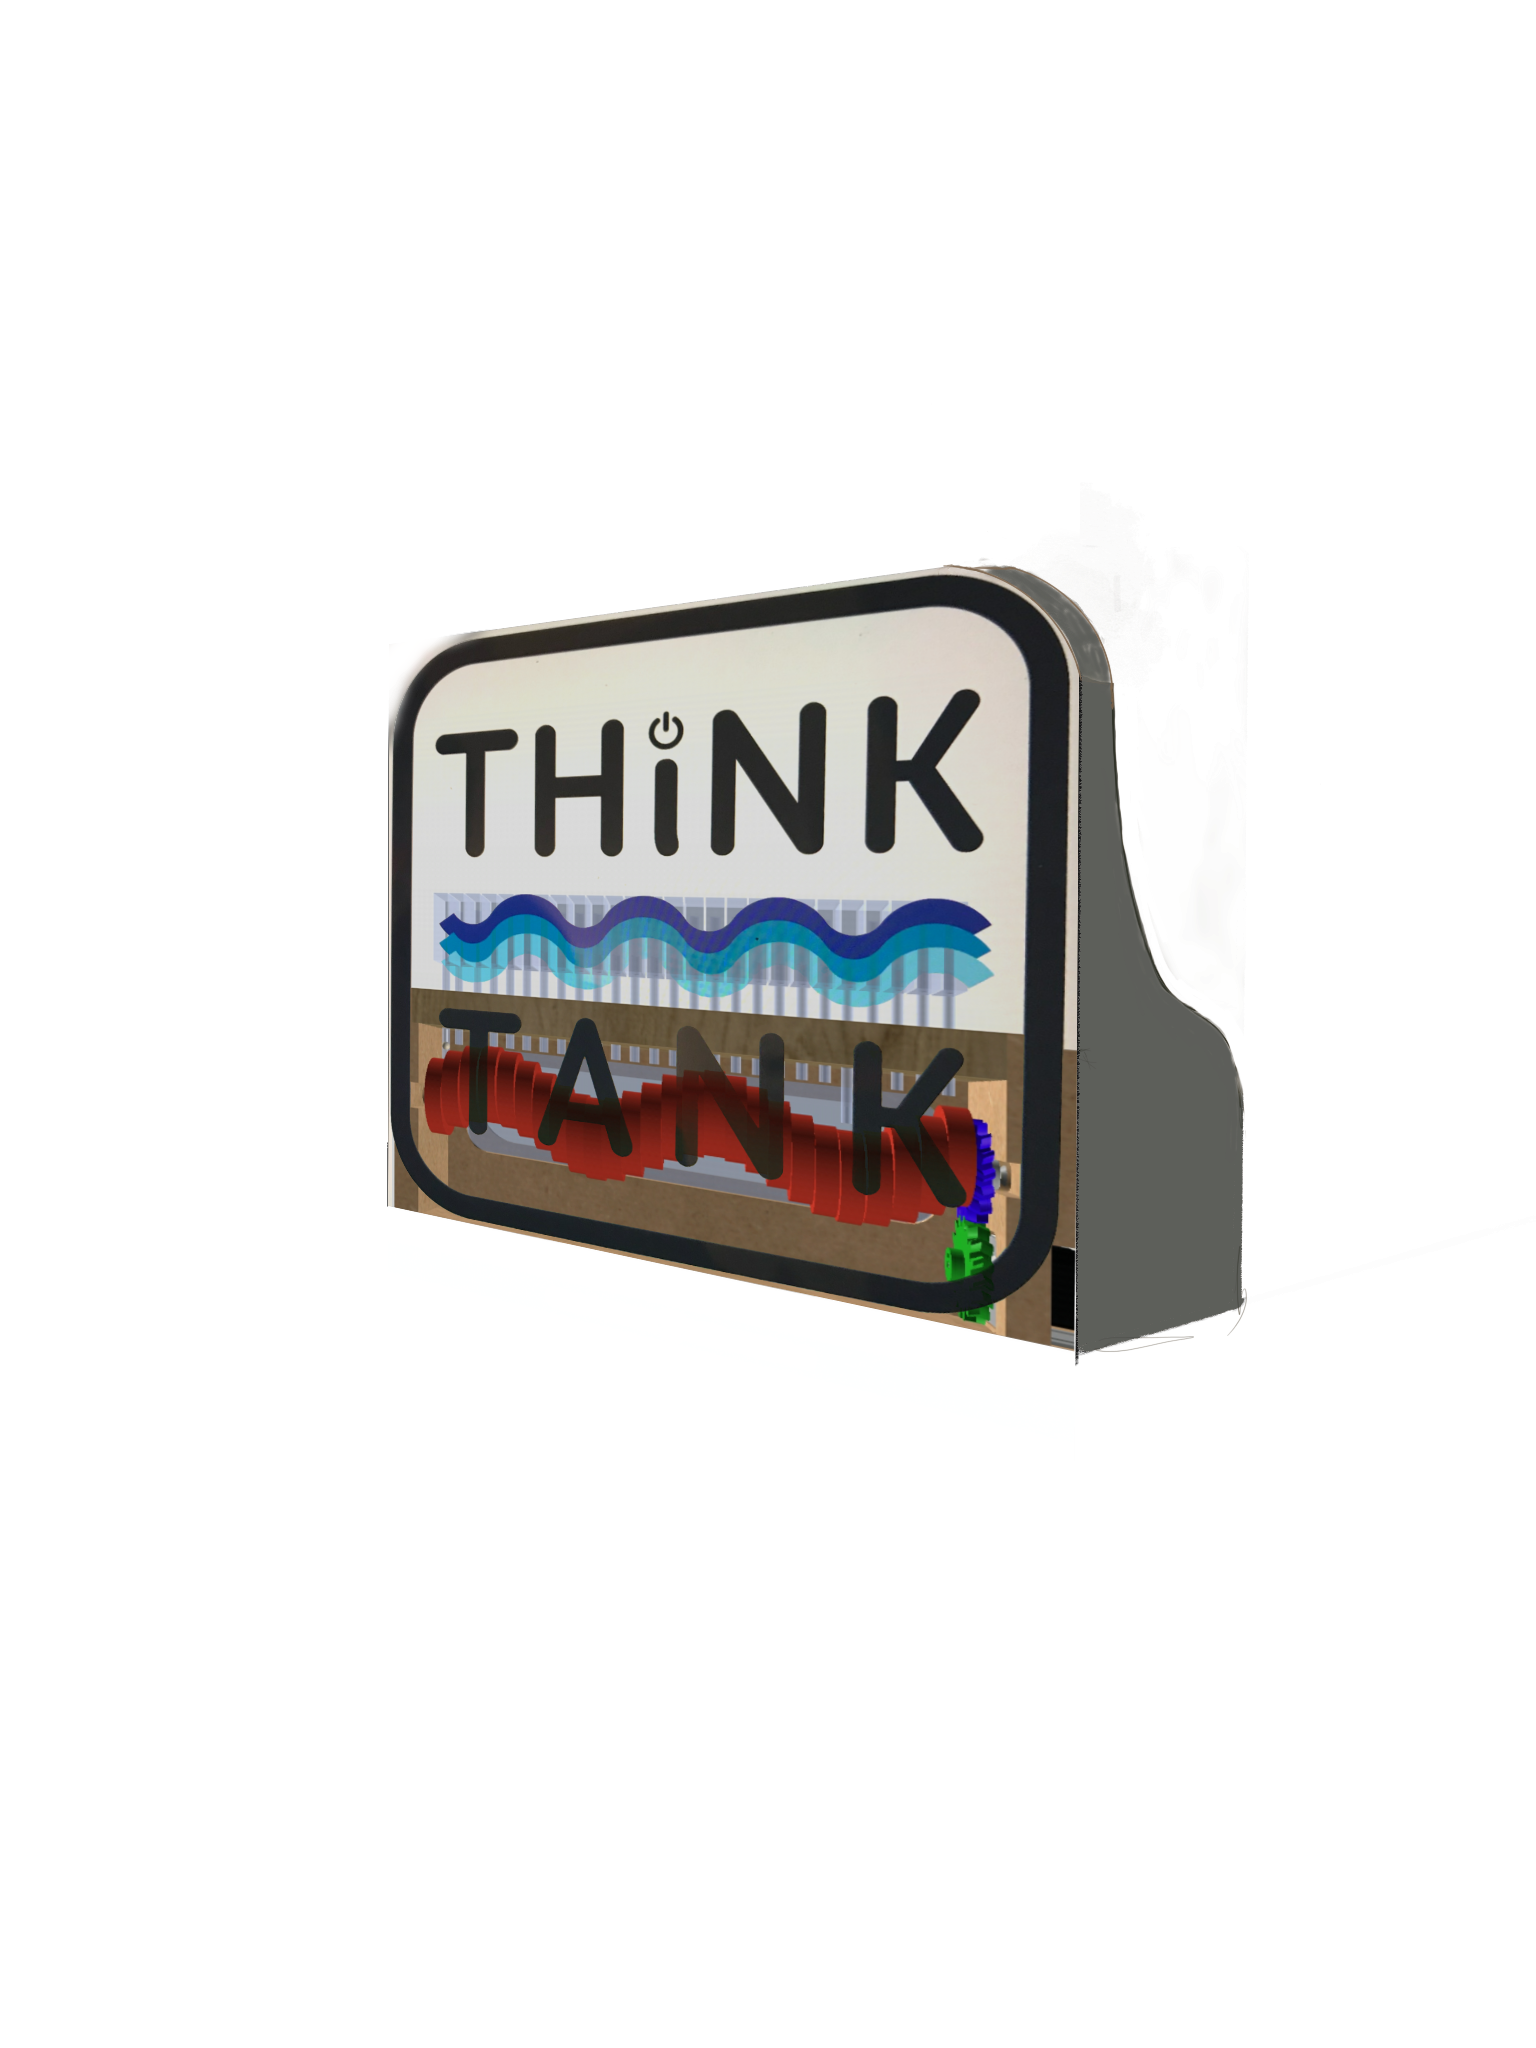
The back board is made of MDF and the sides are Acrylic. I thought it might be nice to allow people to see how the whole things works from the side view. I housed all of the electronics under the main box and painted everything white for good reflection of the light in use.
One thing I never thought about was the scratches on the acrylic from working with it and moving it around. Never use press n seal on acrylic, it leaves a residue that is time consuming to remove. I did learn how to polish acrylic very well. Both flame polishing and buffing to remove any scratches. I am confident in my acrylic skills now. I am pretty happy with the results. Since this is just for my learning and not for my living, I spent lots of time redoing things to improve the results. No money made, but I learned much more than I set out to. I think it was worth the time invested.
Tools:
CNC, 1/4 O-Flute, 1/8 O-Flute
Material:
Cast acrylic sheets purchased from Queen City Polymers
3/4 MDF
Electronics:
Arduino nano, Wemos D1 Mini, A4988 stepper driver, Neopixels, White LED strip


Leave a comment