
I have not had the time to do this myself, but I was watching a Frank Howarth video on extending his CNC bed by 4 feet and posted a comment about possibly adding a 4th axis to that build. he replied that he was planning on it in the spring. Well, it is summer now and these things tend to take longer than what we expect them to.
A couple of weeks later, a commenter replied saying that he was from Belgium and finally received his CNCRP machine. He added a 4th axis and was willing to upload information about the build. He then took time to make a video going in depth to cover the whole process. This is above and beyond what I expected and I am very happy to not have to do it myself.
So, hopefully in the coming weeks, I will be able to get this on my setup and start making some insane stuff for tables and whatever else.
Here is another build that is amazing looking and seems to be something that CNCRP should think about as an addition rather than a custom build.

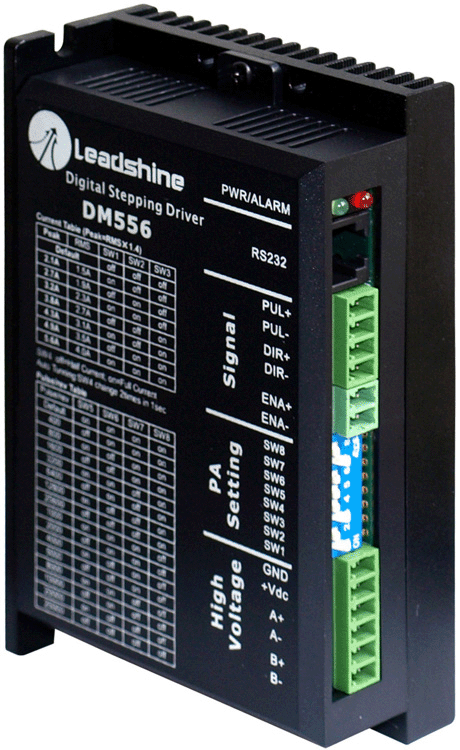
When writing to CNCRP about the stepper motor connection setup, at least with my specific model of 4th axis, they wrote back with this info on setting up the driver to use the correct amperage:
Hi Michael,
The only change required should be to the dip switches that set the current on the drive. The closest setting will be 3.2A, which will be “ON ON OFF” for dip switches 1, 2, and 3 respectively.
The CRP5056 is similar to the DM556 from Leadshine. The silkscreen on the side of the drive shows dip switch settings for current and microstepping, but if you want additional information more can be found here:
Best regards,
Ahren
I will attempt to document and post as many links that I can find for this setup, so that searches lead to good outcomes without having to look everywhere else.


Leave a comment